


开发ASP.NET Atlas服务器端Extender控件——在实际开发中使用编写好的控件
PS:又是好久没更新了,惭愧啊……希望大家继续支持我。
在这个系列的上面几篇(开发ASP.NET Atlas服务器端Extender控件——基本概念以及预先需求,开发ASP.NET Atlas服务器端Extender控件——编写客户端Behavior,开发ASP.NET Atlas服务器端Extender控件——编写服务器端Extender & Dflying近期动向)中,我们完整地开发了一个Atlas服务器端Extender控件。本篇是其中的最后一篇,将介绍如何使用前面编写的这个控件。
首先,建立一个Atlas Web Site,并添加对上面编写的控件的引用,请参考下图:
然后,编写用于检查用户名的Web Service,这里我仅仅简单的假定用户名不能取Dflying。当然在具体的实现中您可以从数据库中查询并验证。将其保存为UserRegisterService.asmx:
 [WebService(Namespace = "http://www.dflying.net/")][WebServiceBinding(ConformsTo = WsiProfiles.BasicProfile1_1)]
 public class UserRegisterService : System.Web.Services.WebService {

 [WebMethod]
 public bool CheckUserName(string userNameCandidate) {
 if (userNameCandidate == "Dflying") return false; return true;
  }
} }
}然后,在页面中添加Atlas的ScriptManager:
<atlas:ScriptManager ID="ScriptManager1" runat="server" />添加一个TextBox,用来输入用户名;一个Label,用来显示验证结果。注意到这两个控件都是ASP.NET的服务器端控件,也就是说您可以采用所见即所得的开发方式,从Toolbox中将它们拖拽到页面上,和我们熟悉的ASP.NET开发模型一样。
<asp:TextBox ID="TextBox1" runat="server"></asp:TextBox><asp:Label ID="Label1" runat="server"></asp:Label>然后是本实例的核心部分,ValidateUserNameExtender的声明。在页面中输入下面的代码,指定我们的控件的属性。当然,如果你愿意,也可以将其添加到Toolbox中,并拖拽到页面上。
<dflying:ValidateUserNameExtender ID="validateUserName" runat="server"> <dflying:ValidateUserNameProperties CheckResultLabelID="Label1" TargetControlID="TextBox1" ServiceName="UserRegisterService.asmx" MethodName="CheckUserName" ValidMessage="You can use this user name." InvalidMessage="This user name has already been used, please choose another." /></dflying:ValidateUserNameExtender>注意到输入的同时IDE的智能感知功能: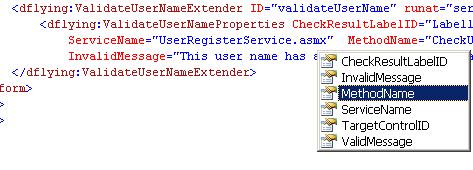
属性窗口中也列出了所有可选属性,这些都大大加快了我们的开发速度: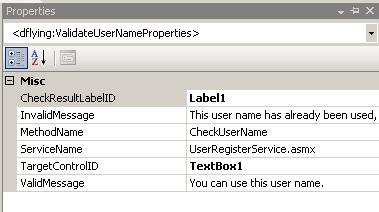
大功告成,浏览器中测试一下,可以使用的用户名: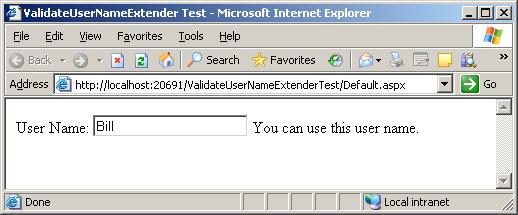
不可以使用的用户名: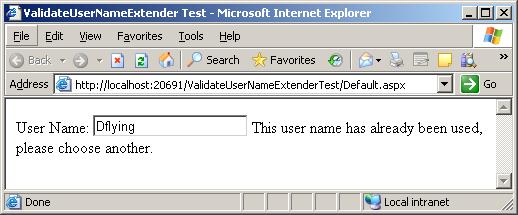
ValidateUserNameExtender和本示例程序的代码可以在此下载:https://files.cnblogs.com/dflying/ValidateUserName.zip
This posting is provided "AS IS" with no warranties, and confers no rights.
