在ASP.NET Atlas中使用Profile Service保存用户信息
English Version: http://me.dflying.net/2006/04/using-profile-service-in-aspnet-atlas.html
作者:Dflying Chen (http://dflying.cnblogs.com/)
我们知道ASP.NET 2.0提供了内建的profile功能支持,用来存放用户的个人信息。Atlas在客户端以AJAX的方式扩展了这个功能。使用Atlas中的profile功能,您可以在客户端用JavaScript访问到用户的profile数据,并可在客户端进行修改并在适当时候将修改后的数据提交回服务器保存,而这一切操作都是采用AJAX的方式完成的。
Atlas中的profile对象是Sys._Profile类的一个实例,Sys.Profile,它代表了当前用户的profile。Atlas同样提供了一个客户端控件Profile,您可以使用它将其他Atlas控件与当前profile绑定。
Sys.Profile对象有如下属性:
- autoSave:布尔值,表示当profile数据被修改后是否自动提交回服务器。
- initialData:初始的profile数据,将和页面一起传输到客户端。
- isDirty:布尔值,表示当前的profile数据是否被修改过,并尚未提交到服务器。
- propertyNames:Name-Value的集合,存放当前的profile数据。例如,若需要访问profile中的FirstName属性,您可以使用Sys.Profile.properties.FirstName或Sys.Profile.properties["FirstName"]两种方式。
还有如下方法:
- load:从服务器取得当前用户的profile数据。
- save:将客户端的用户的profile数据提交回服务器。
如下事件:
- loaded:当取得profile数据完成时被引发。
- saved:当提交profile数据完成时被引发。
使用Sys.Profile对象提供的上述属性/方法/事件,我们可以很容易的编写高度可自定义的Atlas应用程序。现在让我们通过一个示例程序来熟悉Sys.Profile的使用。
该实例程序将允许我们取得并显示自己的profile数据,并可在修改后提交回服务器保存。其中定义的profile很简单,见如下web.config定义:
 <profile>
 <properties>
 <add name="FirstName" />
 <add name="LastName" />
 </properties>
 </profile>
我们同样需要在web.config中启用相应的服务:
 <configSections>
 <sectionGroup name="microsoft.web" type="Microsoft.Web.Configuration.MicrosoftWebSectionGroup">
 <section name="webServices" type="Microsoft.Web.Configuration.WebServicesSection" requirePermission="false"/>
 <section name="profileService" type="Microsoft.Web.Configuration.ProfileServiceSection" requirePermission="false"/>
 </sectionGroup>
 </configSections>
还有,在microsoft.web段中:
 <webServices enableBrowserAccess="true"/>
 <profileService enabled="true" setProperties="FirstName;LastName" getProperties="FirstName;LastName" />
注意到通过上面的设定,我们使FirstName和LastName属性在客户端可见。然后我们在Membership数据库中添加几个测试的用户,您可以通过ASP.NET Web Site Administration Tool来设置并添加用户。
配置文件的工作到此为止,我们来创建一个ASP.NET页面,并在其中加入一个ScriptManager控件:
 <atlas:ScriptManager ID="scriptManager" runat="server" />
然后加入一个包含两个input的HTML table,用来显示,修改用户的profile数据:
 <table id="tbProfile" style="border: 1px solid black;">
 <tr align="center">
 <td colspan="2"><b>Your Profile Values</b></td>
 </tr>
</tr> <tr>
<tr> <td>First name:</td>
 <td><input type="text" id="txtFirstName" /></td>
 </tr>
</tr> <tr>
<tr> <td>Last name:</td>
 <td><input type="text" id="txtLastName" /></td>
 </tr>
</tr> </table>
还有一个按钮用来触发保存操作:
 <input type="button" id="update" value="Update!" />
在这个示例程序中为简单起见,我们仅仅的使用一个ASP.NET服务器控件Login来实现用户登录,它会引发一次PostBack。如果您需要以AJAX的方式登录,请参考在ASP.NET Atlas中结合Membership进行身份验证。
 <asp:Login ID="Login1" runat="server">
 </asp:Login>
下面是一些JavaScript代码,用来相应事件并控制Sys.Profile对象:
 function OnLoad() {
 Sys.Profile.saved.add(onSaveComplete);
 }
} function OnSave() {
 Sys.Profile.save();
 }
} function onSaveComplete() {
 alert('The profile has been saved.');
 }
}下面是Atlas的XML脚本。我们可以看到在页面装载完成后,开始执行OnLoad()方法,其中添加了保存profile完成后的事件处理函数。在update按钮被点击时,OnLoad()方法将被执行,将客户端的profile提交回服务器。
 <script type="text/xml-script">
 <page xmlns:script="http://schemas.microsoft.com/xml-script/2005">
 <components>
 <profile id="profilecontrol" autoSave="false" />
 <textBox id="txtFirstName" >
 <bindings>
 <binding dataContext="profilecontrol" dataPath="FirstName" property="text" direction="InOut" />
 </bindings>
 </textBox>
 <textBox id="txtLastName" >
 <bindings>
 <binding dataContext="profilecontrol" dataPath="LastName" property="text" direction="InOut" />
 </bindings>
  </textBox>
 <button id="update">
 <click>
 <invokeMethod target="application" method="OnSave" />
 </click>
 </button>
 <application id="application" load="OnLoad">
 </application>
 </components>
 </page>
 </script>
上面同样需要注意的是我们设定了上述绑定的绑定方向为InOut,这样对input中数据的改变将被自动反射到实际的profile数据中。
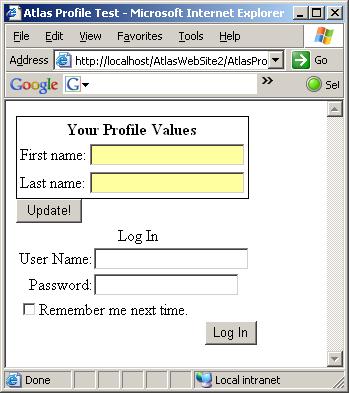
OK, 浏览器中测试一下,页面装载:
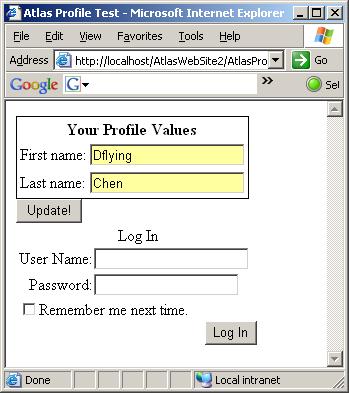
Dflying登录后,您可以看到两个input已经填充了我的profile信息:
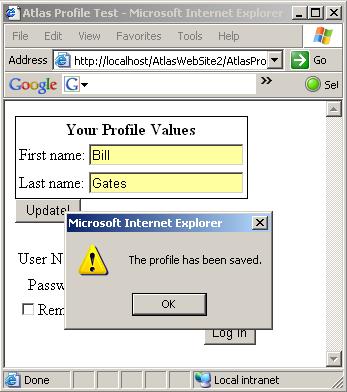
修改这两个input的内容,把我升级成Bill Gates。呵呵,一秒钟以内就搞定了。(yy中……)
以上示例程序可以在此下载:https://files.cnblogs.com/dflying/AtlasProfileTest.zip
This posting is provided "AS IS" with no warranties, and confers no rights.


